Glass cutting looks simple until a clean score turns into a chipped edge. The result depends on the glass type, thickness, tool condition, and steady technique. A dull wheel or uneven pressure can send a crack off course. Small details matter.
This guide explores ten practical ways to improve cuts and explains how to achieve smooth edges in glass cutting. It covers selecting suitable glass, preparing a clean work surface, measuring carefully, and guiding the cutter with a straightedge. You will also learn why one continuous score is usually better than repeated passes, and how controlled breaking can reduce jagged fractures. No single setting works for every pane. That is worth remembering.
Edge quality matters after the cut, too. Light grinding with appropriate abrasive tools can soften sharp edges, while excess pressure may cause chips or flaws. Wear eye protection and cut-resistant gloves, secure the glass, and follow the tool maker’s instructions. Tempered, laminated, large, or unusually thick panels may need different methods; consult a qualified glass professional when unsure. Experience helps, but it cannot replace a careful assessment of the material. Even practiced hands can misjudge a score. The tips ahead offer a useful starting point, not a guarantee, so inspect every edge under good light before handling or installation.
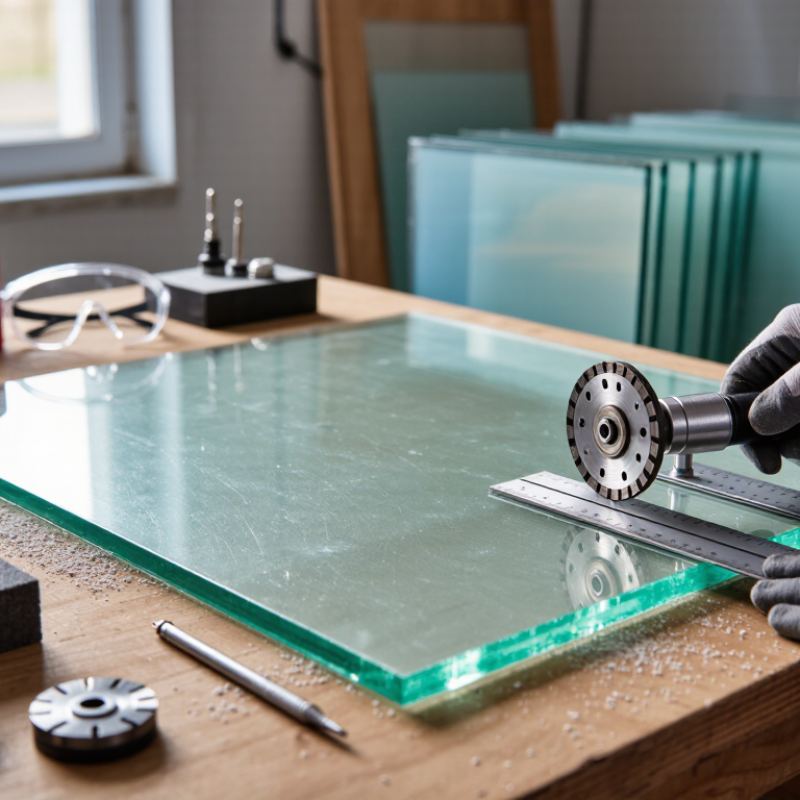
The glass type determines which tools will work. For a small home project, annealed glass is usually the practical choice because it can be scored and snapped along a straight line. Check the pane’s thickness and condition before cutting; chips near an edge can send a crack off course. Tempered glass cannot be cut after tempering, while laminated glass needs a different process and suitable equipment. Do not guess.
A glass cutter should match the material’s thickness, and its wheel must roll smoothly. Use a rigid straightedge, a clean work surface, and cutting fluid if the tool instructions call for it. Wear eye protection and cut-resistant gloves. Keep fingers clear of the score line. One steady pass is better than repeated scoring, which can leave a ragged track. Listen for a faint, even scratch. It is a useful clue, not a guarantee.
After snapping the pane, inspect the edge under good light. A score line is not a finished edge; use a suitable abrasive stone or glass grinder to smooth sharpness. Move evenly and avoid pressing hard in one spot. I have found that rushing this step often creates tiny chips, even when the cut looked clean. That part takes patience. Keep the work area free of glass fragments, and replace a damaged tool rather than forcing it through the pane.
Before cutting, clear a level, sturdy workbench and cover it with a clean, non-slip surface. The glass should lie flat without rocking. Keep the cutting area bright, and move drinks, loose tools, and unrelated materials away. Wear safety glasses and well-fitting, cut-resistant gloves. Keep children and pets outside the work area. Small fragments travel farther than expected.
Clean both sides of the glass with a soft cloth, then check for dust, dried residue, chips, or cracks. A speck beneath the sheet can affect its support; a damaged edge may break unpredictably. Keep it dry. Measure twice and mark the cut line with a removable marker or suitable guide. Place a straightedge firmly, but avoid pressing hard enough to shift the glass.
Set a rigid container nearby for offcuts and shards, and never sweep fragments into an open hand. Good preparation reduces distractions, though it cannot remove every risk. I sometimes catch myself focusing on the measurement and forgetting to check the bench again. That second check is worth the pause. If the glass moves, stop and reset it rather than trying to score through a shaky setup.
Smooth edges begin before the cutter touches the glass. Clean and dry the surface, then set it on a flat, padded workbench so it cannot shift. Mark the cut with a fine-tip marker and a straightedge. Check the line from both ends before scoring; even a small alignment error can leave the break wandering. Keep it simple.
Hold the cutter upright and draw it toward you in one continuous motion. Use firm, even pressure from start to finish. A steady, faint hiss is a useful sign; loud scraping can indicate too much force. One pass. Do not retrace the score, since a second pass may create chips and an unpredictable break. Start at the glass edge and continue just beyond the far edge, without pausing midway. If the line wanders, stop and reassess the alignment rather than pressing harder. Wear eye protection and cut-resistant gloves, and keep hands clear of the scored line. Even careful work can produce a rough edge, so inspect it before handling the piece further.
| # | Tip | How to Do It | What to Check |
|---|---|---|---|
| 1 | Clean and dry the glass | Remove dust, grit, and oily residue from the cutting path before marking or scoring. | The surface is clear of particles that could interrupt the score or scratch the glass. |
| 2 | Measure and mark carefully | Measure from a consistent reference edge and make small, visible marks at the intended cut line. | The measurement is checked before scoring, and the marks align with the guide. |
| 3 | Use a straight, secure guide | Align a straightedge with the cut line and hold it firmly so it cannot shift during the pass. | The guide stays in place from the start of the score to the end. |
| 4 | Choose a suitable glass cutter | Use a cutter intended for the type and thickness of glass being worked on, following its instructions. | The cutting wheel is clean and undamaged; replace or service a worn cutter. |
| 5 | Keep the cutter at a steady angle | Hold the cutter as recommended by its manufacturer and keep its position consistent along the guide. | The wheel tracks smoothly without tilting or wobbling. |
| 6 | Apply consistent, moderate pressure | Make one continuous pass with enough pressure to create a clear score, without forcing the cutter heavily into the glass. | The score is continuous and even. Excessive pressure can produce rough edges or unwanted cracks. |
| 7 | Score in a single pass | Guide the cutter from one edge to the other without stopping or retracing the same line. | A single, uninterrupted score is preferable to repeated passes, which may cause irregular breaks. |
| 8 | Support the glass evenly | Work on a stable, flat surface and support the pane on both sides of the intended cut. | The glass does not flex, rock, or hang unsupported near the score. |
| 9 | Separate the glass with controlled support | After scoring, use an appropriate controlled breaking method for the glass and cut size; avoid twisting or sudden impact. | The break follows the score rather than branching away from it. |
| 10 | Inspect and finish the edge safely | Check the edge for sharp points or chips and use suitable glass-finishing equipment when a smoother edge is required. | Wear eye protection and cut-resistant gloves; handle offcuts and finished glass carefully. |
Note: Cutting methods depend on glass type and thickness. Do not score or cut tempered glass; consult a qualified glass professional when the material or procedure is uncertain.
A clean break starts with a score that is continuous, not heavy. Use a sharp wheel and steady pressure, keeping the cutter perpendicular to the glass. The score should make a faint, even sound. A deep, white track can signal excessive pressure and create chips instead of a controlled fracture. Keep the sheet flat on a clean, padded surface, and align the score with a straightedge or table edge before breaking. Small glass particles under the sheet can spoil the line. They are easy to miss.
ASTM C1036-21 sets thickness tolerances for flat glass by nominal thickness and product type. That matters: two sheets marked with the same nominal size may not behave identically at the score. Check the actual thickness and support the glass close to the line. Apply gradual, even pressure from beneath, or use running pliers suited to the glass thickness. Avoid twisting the sheet. If the break stalls, stop and reassess the score rather than forcing it; the tempting extra push can send the fracture off course. Even careful work has imperfect results, so inspect the edge under good light and use suitable eye and hand protection while handling the cut piece.
A smooth edge begins with controlled grinding, not aggressive pressure. Use a coarse abrasive only to remove saw marks, then move through finer grades in consistent steps. Keep the glass and wheel wet; water helps carry away abrasive debris and limits heat buildup. Keep it steady. Uneven pressure can leave scallops, while a wheel that is too fine too early may polish over deeper chips instead of removing them.
Inspect the edge under angled light after each stage. Look for white chips, continuous scratches, and a rough arris; record chip depth in millimeters and compare it with the job drawing. ASTM C1036 covers flat-glass quality, while ASTM C1048 sets requirements for heat-treated flat glass, including edge and dimensional considerations. These are product standards, not a universal grinding recipe, so follow the fabricator’s specified tolerances. One limitation: a bright polish can still conceal subsurface damage. If the edge feels sharp, return to fine grinding before polishing, then clean it and check again with a gloved hand.
Annealed glass is usually practical. It can be scored and snapped along a straight line.
No. Tempered glass cannot be cut after tempering.
Not usually. It needs a different process and suitable equipment, so check the required method before starting.
Match the cutter to the glass thickness. Use a smooth-rolling wheel, rigid straightedge, clean work surface, and cutting fluid if specified.
Make one steady pass. A faint, even scratch can help, but it does not guarantee a clean break.
Wear eye protection and cut-resistant gloves. Keep fingers away from the score line and clear fragments from the work area.
Use a suitable abrasive stone or grinder. Work evenly, starting coarser and moving to finer grades. Avoid hard pressure in one spot.
Inspect it under angled light for chips and scratches. A bright polish may hide damage below the surface. Not always obvious.
Water carries away abrasive debris and limits heat. I might rush this step, but tiny chips can still appear, so inspect again.
This guide explains how to achieve smooth edges in glass cutting through a careful, step-by-step process. It begins with choosing a glass type suited to the project and selecting appropriate cutting and shaping tools. Before making a cut, clean and prepare the glass, then arrange a stable, well-lit workspace and use suitable protective equipment. Clear preparation helps reduce movement and makes each step easier to control.
Next, mark the intended line and score the glass with steady, consistent pressure, aiming for one clean pass rather than repeated strokes. Apply controlled force to separate the glass along the score, supporting it properly to encourage a clean break. Finally, grind and polish the newly cut edge gradually, removing sharpness and refining the finish. Patience, accuracy, and attention to safety throughout the process are essential for a neat result.

Focus Laser